📐 PlanIT! Manual
layout drafting board · companion to TrackIT!1 · What is PlanIT!?
PlanIT! is a drafting board for model railway layouts that refuses to lie to you. Every alignment is real permanent-way geometry — straights, constant-radius arcs and true clothoid transitions — and every turnout, tandem turnout, diamond and slip is generated live by the same BS113A geometry engine that TrackIT! uses to manufacture them. If it fits on the PlanIT! plan, TrackIT! can print the template, cut the bearer fret and print the chair rafts for it. Nothing on the plan is a symbol; everything is buildable.
It runs entirely in the browser from a single file. No install, no account, no internet needed (except for the optional historic map tiles). Plans save to a small JSON file and autosave locally between sessions.
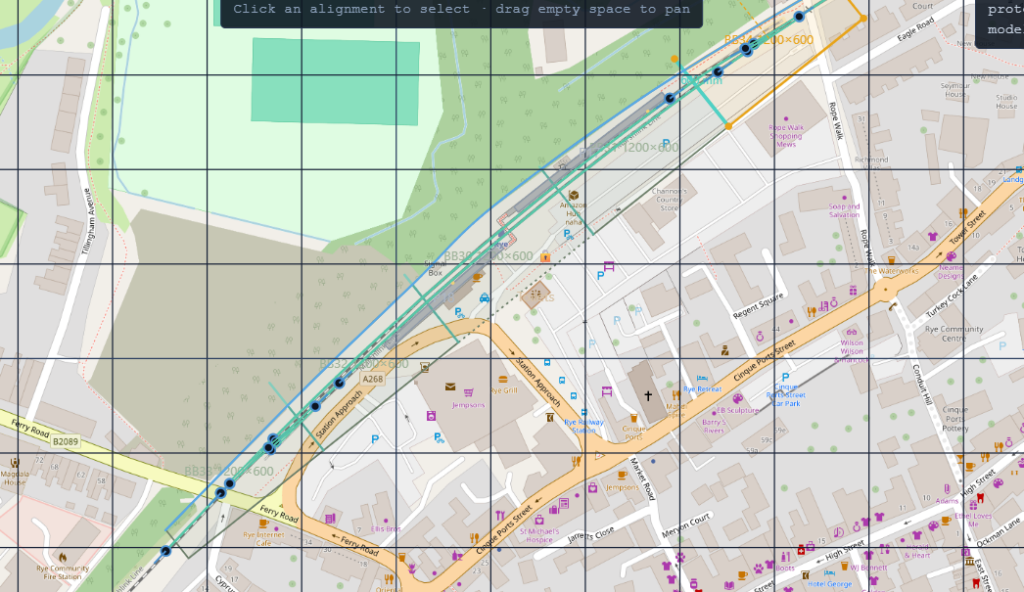
Who is it for? Finescale modellers planning real track — P4, S4, EM, OO-SF, O, S7 and friends — especially anyone recreating a prototype location: load a historic Ordnance Survey map straight from the National Library of Scotland, calibrate it, and draw the actual formation over the actual survey. It is equally at home sketching a freelance scheme on a blank grid with baseboards, platforms and buildings blocked in.
PlanIT! is one of a family: TrackIT! designs and manufactures the individual S&C units, BaseIT! turns the baseboards into laser-cut kits, and BuildIT! turns traced building footprints into model kits. PlanIT! is the drawing where they all meet.
Contents
2 · The screen at a glance
Almost the whole window is canvas. The chrome is deliberately thin:
- Top bar — undo/redo, the placement palette (which turnout, tandem or diamond/slip the placing tools will drop, and its hand), and four buttons on the right: ⚙ settings, 🗺 underlay & map, 🌙 theme, and the ≡ menu.
- Left tool rail — every tool, one icon each. Hover for the name and its keyboard shortcut. Top to bottom: select, the drawing tools, the placing tools, the scenery tools, pan, and the square-up toggle at the foot.
- Right panel — the list of every alignment, unit, building, platform, board and fascia in the plan. Click to select; click the header to collapse the whole panel to a thin strip.
- Floating inspector — appears when something is selected, showing its editable properties. Drag it by its title bar to wherever it least annoys you; it remembers. ✕ hides it until you select something else.
- View cluster (bottom right) — zoom in/out, fit-all, and the rails / sleepers detail toggles (these draw only when you are zoomed in far enough for them to mean anything).
- Footer — project summary, current view scale, and the shortcuts dialog.

3 · Projects, scale & settings
The ≡ menu holds the project verbs: New, Save (a JSON file
you keep — also Ctrl+S), Load, and Import templates for a
trackit_templates.json exported from TrackIT!’s library. The plan also autosaves to
the browser continuously, so closing the tab loses nothing.
The ⚙ settings popover sets the working context:
- Model scale — OO 1:76.2, HO, N, O, O-fine, Gauge 1, G, TT, or a custom ratio.
- Track centres — the prototype spacing (default 3400 mm) used by parallel-track creation and the crossover wizard.
- Baseboard size — the preset the baseboard tool drops.

4 · Drawing track
Alignments are ordered runs of spans: straight, arc (constant radius) and transition (clothoid — curvature ramps smoothly between two radii). Four tools create them:
- ╱ Straight S — click the start, click the end.
- ◜ Arc A — click the start, the end, then a third click sets the bulge.
- 🔗 Link K — click two free alignment ends and PlanIT! solves a smooth transition (or S-curve) between them, matching position, bearing and curvature at both ends.
- ✂ Split — cuts an alignment in two at the clicked point.
Tangent snapping is the heart of it. Start a draw near a free track end — or near any free port of a placed unit (a turnout’s branch, a tandem’s diverging roads, any corner of a diamond) — and the new track departs from that exact point, at the exact bearing, continuing the exact curvature. No kinks, ever. Hold Alt to skip the snap and draw free.

5 · Editing alignments
Select an alignment and the inspector lists its spans. Each row shows the span kind, its length, and — for arcs and transitions — an editable model radius field with the prototype equivalent alongside. Type a new radius and the plan updates.
- Extend / append — add spans at either end; each continues tangent from the last, transitions inherit the running curvature. The ▸ arrows on the canvas extend the end spans by dragging.
- Handles — drag the ▢ at the start to move the whole alignment, the ○ to rotate it.
- Parallel track — one click makes a parallel road left or right at the project track centres, with the connecting geometry solved for you. A parallel siding keeps an editable offset.
- To TrackIT! — send the whole alignment (or just the stretch on one baseboard) to TrackIT!’s Plain Line tab for manufacture; the cut lands where the rail joint goes.

6 · Placing pointwork
Pick a unit in the top-bar palette — every BS113A turnout the engine holds, tandem turnouts, plain diamonds, single and double slips — choose the hand, take the ⑂ Turnout tool T and click. Near a track, the unit snaps: it lands on the rail, adopts the track’s curvature (turnouts, tandems and diamonds all curve — curved diamonds are special work and PlanIT! says so), and can then be slid along the track by dragging. It stays glued to its road until you pull it well clear.
Every free port snaps, both ways. Drag a tandem in trailing-branch-first and the trailing branch is what glues; drag a slip in by road B and road B seats. The winning port becomes the unit’s anchor (shown as ▢, and as “snap by” in the inspector). Equally, a new unit placed near an existing unit’s free port butts straight up against it, tangent, continuing its curvature.
- Trim track to this unit — cuts the running track at the unit’s ports, leaving approach and departure alignments correctly joined. This is how a unit becomes part of the formation.
- Swap to road B / flip hand / reverse — inspector buttons; swapping road sends the crossing road the other way through a diamond.
- Open in TrackIT! — the round trip: the exact unit, curvature included, opens in TrackIT!’s matching tab ready to export bearers, frets, rafts and full-size templates.

7 · Crossovers, diamonds & Fit Xing
The ⤴ Xover tool X reads the palette and does the right thing:
- Turnout in the palette + two parallel tracks → a crossover: both turnouts placed, closure rail solved nose-to-nose. Straight tracks use the exact closed-form construction; curved tracks use a solver that keeps the closure smooth (it reports the residual, typically well under a millimetre). There is also a one-click “Make crossover” on any placed turnout.
- Diamond/slip in the palette + two tracks that actually cross → the unit lands at the crossing: the angle is read off the tracks (not the palette), snapped to the nearest tabulated angle (1:4¾ to 1:8), and the curvature taken from the tracks. If no diamond can fit — wrong angle, or the two tracks curve differently (a diamond is one rigid unit with one curvature) — it refuses and tells you which problem to fix and by how much.


When two tracks don’t cross at a usable angle, the ◇ Fit Xing tool C bends the tracks to the unit instead: click the track to keep put, then the track to swing. It eases both to a common radius if they differ, swings the second about the crossing point so the angle comes out exactly tabulated, then drops the diamond in — reporting everything it changed. One undo restores both tracks and removes the unit.
8 · Underlays & historic maps
The 🗺 popover holds two ways to put the real world under your plan:
- Underlay image — load a screenshot, scan, aerial photo or a PDF page (or just Ctrl+V paste / drop a file). Position drags it into place (Shift-drag rotates); Calibrate asks for two clicked points and the real distance between them — in metres, feet, yards, chains or km — and scales it exactly.
- Historic map — live Ordnance Survey tiles from the National Library of Scotland.
Paste an
exploreURL from maps.nls.uk (or a plain “lat, lon”) and Go. The opacity slider fades the map back so the track reads over it.

9 · Baseboards, buildings, platforms & fascia
- ▧ Baseboards D — click to drop the preset size, or drag a custom rectangle (Alt-click traces an irregular polygon). Boards snap edge-to-edge, rotate, lock as a datum, duplicate, and report deck area and construction. Export baseboard data → BaseIT! turns the set into a laser-cut kit.
- 🏢 Buildings B — trace footprints over the map, corner by corner. With ⊾ Square-up on (foot of the tool rail), corners snap to right angles on close. Set the number of storeys; export every footprint as JSON for BuildIT!.
- ▭ Platforms P — click the two ends beside a track, then the track: the platform edge follows the curve at the correct offset. Islands and freehand tracing both supported.
- ⌒ Fascia F — trace a flowing scenic edge (river bank, road, hedge line); every baseboard it crosses is trimmed to it, and the flexi-ply strip unrolls flat so BaseIT! cuts it as a plain rectangle. It warns where a bend is tighter than 3 mm ply bends comfortably.

10 · Outputs — print, BOM, exports
- 🖨 Print — the whole plan tiled at exactly 100% model scale across A4–A1 sheets, with registration marks, sheet grid references and a 100 mm scale-check ruler. Lay the sheets on the baseboard and build straight onto them.
- 📋 Bill of materials — every turnout/tandem/diamond by type, plain-track lengths by kind, curve radii, crossovers, baseboards. Copy, CSV, or print.
- 🏢 Export buildings — one JSON per footprint, for BuildIT!.
- Per-item hand-offs — any unit or alignment opens directly in TrackIT!; any board set exports to BaseIT!.
11 · Making the most of the interface
- Theme — 🌙/☀ in the top bar. The whole drawing restyles with the chrome, and the choice is remembered. (This manual has the same toggle, top right.)
- Collapse what you aren’t using — the right panel folds to a strip; the inspector’s ✕ hides it for the current selection; together they give you effectively the whole window as canvas.
- Undo — Ctrl+Z, deep history; a drag or a slider counts as a single step, and even a Fit Xing (which modifies two tracks and places a unit) is one undo.
- Selection — Shift-click builds a multi-selection; G groups it so a whole junction moves as one.

12 · Keyboard shortcuts
| Key | Action |
|---|---|
| V | Select / edit |
| S / A | Draw straight / arc |
| K | Link two ends (transition / S-curve) |
| T | Place the palette unit |
| X | Crossover wizard — or a diamond at a crossing |
| C | Fit Xing — bend two tracks to suit a diamond |
| B / P / D / F | Building / platform / baseboard / fascia |
| Space (hold) | Pan |
| Home | Fit all to view |
| Ctrl+Z / Ctrl+Y | Undo / redo |
| Ctrl+S | Save project file |
| Delete | Delete the selection |
| G | Group the multi-selection |
| Enter / Esc | Finish an outline / cancel anything |
| Wheel · drag empty | Zoom about the cursor · pan |
| Alt+click | Drawing: skip the tangent snap (draw free) |
| Shift+drag ↻ | Rotate a unit in 15° steps |
PlanIT! · © J.Walters 2025-26 · www.makeitminiature.co.uk · manual first draft, August 2026